Tag Archives: hardwood

Mudgee – Follow the Build Part 9

EXTERNAL WALLS

IMG_1763


Well, as you know, it’s been really busy over the last weeks with The Block and other engagements but I always find time to squeeze in where I can to continue my projects.

So here is another update on my project Follow the Build Part 9.

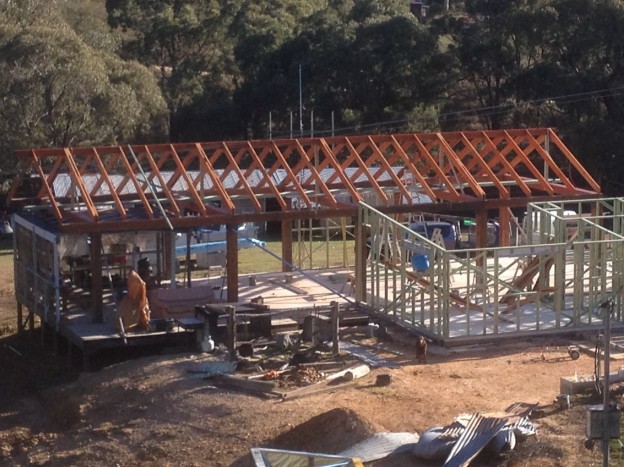
You would have read in Follow the Build Part 8 - all about recycled oregan pitched roof for my lounge and dining.

IMG_1477

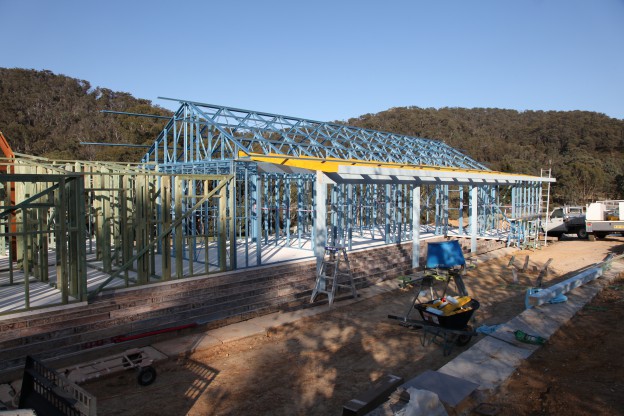
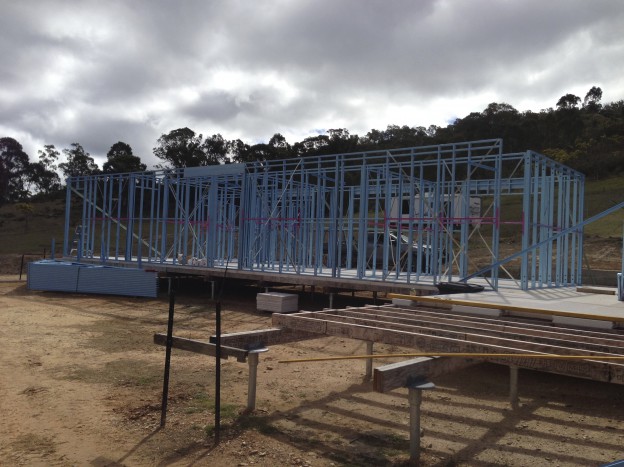
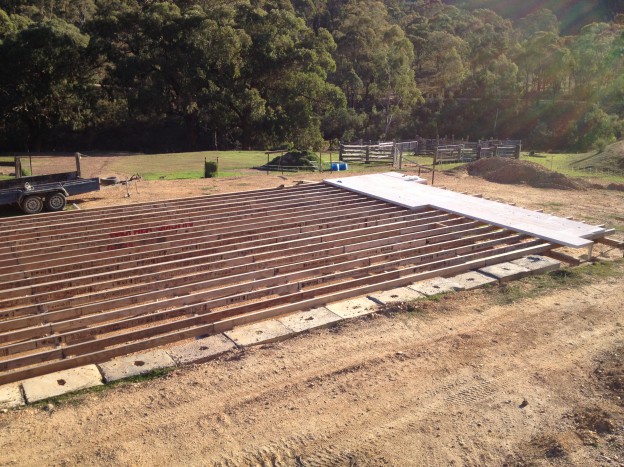
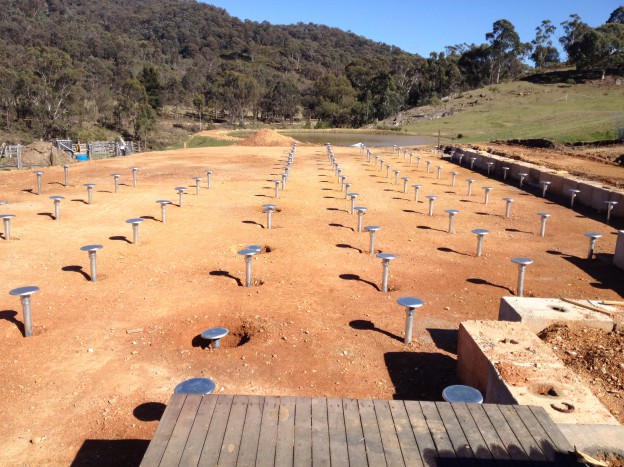
Now if you’re like me, nothing says the Australian bush than corrugated iron. When you combine that with a bit of good old aussie hardwood, you come up with the classic bush house.

IMG_1759

If you combine it with a contemporary twist, you will get a modern feel with a traditional look. I also wanted the house to have a shearing shed look and I think we’re on the way to achieving that. I’m really happy with the progress so far and look forward to doing more…

Well that’s it, for the moment folks. Keep following the build and let me know your thoughts via my Scotty Cam Facebook Page. 

Won’t be long till the next update so stay tuned for part 10 coming very soon…


Related: Follow the Mudgee build

Mudgee – Follow The Build Part 10

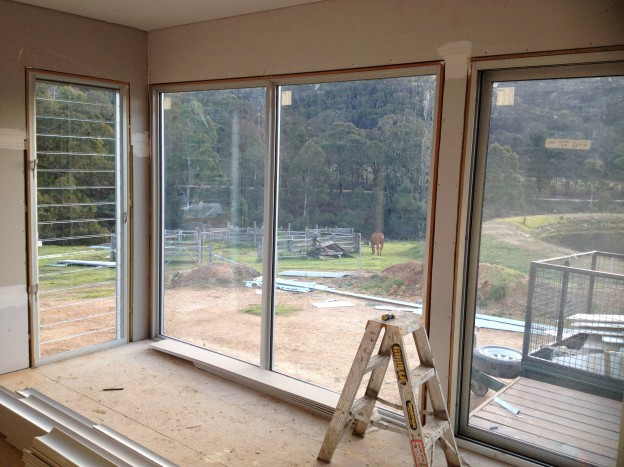
EXTERNAL WINDOWS AND DOORS It’s been a busy few weeks for me as The Block has gotten down to the business end of the competition. But my projects are coming along nicely. Here’s the latest update on my project Follow the Build – Part ... [read more]

Mudgee – Follow the Build Part 8

RECYCLED OREGAN PITCHED ROOF FOR LOUNGE/DINING   Here is another update on my project – Follow the Build Part 8.   You would have read in my last post Follow the Build Part 7 where I was working on the kitchen and laundry frame. I’ve a ... [read more]

Mudgee – Follow the Build Part 8

RECYCLED OREGAN PITCHED ROOF FOR LOUNGE/DINING
 IMG_0801

Here is another update on my project – Follow the Build Part 8.  

You would have read in my last post Follow the Build Part 7 where I was working on the kitchen and laundry frame. I’ve already got the structural post and beams up with my ironbark and now it’s time to pitch the roof.

IMG_0916

I’m using recycled oregan beams. There will be a double rafter over the posts to fill out the look and singles everywhere else.

IMG_0873

You will see that I’ve pre-painted the rafters using Intergrain DWD. I love this product! It really brings out the natural look of the timber as you can see in the picture. The sun is just gleaming on those timber posts.

IMG_0786

Finally, strutting the ridge beam are ironbark fence posts also painted with DWD. Don’t they look terrific! It was a big job indeed but what a result.

Well that’s it, for the moment folks. Keep following the build and let me know your thoughts via my Scotty Cam Facebook Page.

Won’t be long till the next update so stay tuned for part 9 coming very soon…


Related: Follow the Mudgee build

Mudgee – Follow the Build Part 9

EXTERNAL WALLS Well, as you know, it's been really busy over the last weeks with The Block and other engagements but I always find time to squeeze in where I can to continue my projects. So here is another update on my project Follow the ... [read more]

Mudgee – Follow the Build Part 7

KITCHEN AND LAUNDRY FRAME Here is another update on my project – Follow the Build Part 7. You would have read in Follow the Build Part 6 about using Bluescope Steel. Working away on the kitchen and laundry frame, it was a little differen ... [read more]

Mudgee – Follow the Build Part 7

KITCHEN AND LAUNDRY FRAME

IMG_7721

Here is another update on my project – Follow the Build Part 7.

You would have read in Follow the Build Part 6 about using Bluescope Steel. Working away on the kitchen and laundry frame, it was a little different to the bedrooms as they had to be handmade on site. Sometimes what the plans say and what’s happening on site don’t always match up. Not saying that the plans were wrong, it sometimes happens when you’ve got a complicated build in joining up three areas in the bedroom, the kitchen/laundry and lounge/dining areas.

IMG_7727

The roof lines and falls all had to tie in together to make it work. So it was timber frame on site and I think improvisation on site is the best style of carpentry and certainly when it works – it works.

IMG_7717

IMG_7728

Well that’s it for the moment folks. Keep following the build and let me know your thoughts via my Scotty Cam Facebook Page.

Won’t be long till the next update so stay tuned for part 8 coming very soon…


Related: Follow the Mudgee build

Mudgee – Follow the Build Part 8

RECYCLED OREGAN PITCHED ROOF FOR LOUNGE/DINING   Here is another update on my project – Follow the Build Part 8.   You would have read in my last post Follow the Build Part 7 where I was working on the kitchen and laundry frame. I’ve a ... [read more]

Mudgee – Follow the Build Part 6

BLUESCOPE STEEL FRAMES FOR THE BEDROOMS Here is another update on my project Follow the Build Part 6. You would have read in Follow the Build Part 5 which was all about iron bark posts and beams. Now I’ve always been a timber man when ... [read more]

Mudgee – Follow the Build Part 6

BLUESCOPE STEEL FRAMES FOR THE BEDROOMS

IMG_1388 (2)

Here is another update on my project Follow the Build Part 6.

You would have read in Follow the Build Part 5 which was all about iron bark posts and beams.

Now I’ve always been a timber man when it comes to framing. I started out as an apprentice building frames by hand. Cutting all the the studs on a super saw, marking out the top and bottom plates and knocking them together with 3 inch bullet heads and hammer. But for this job through my mates at Macdonald Jones Homes, I was convinced to use Bluescope steel frame.

IMG_7610

I got to say it was a lot easier. It all came pre made as you would find in timber truss and frame but so much lighter and easier to handle. All frames went up in a day and the roof trusses on day 2.

IMG_7729

Day 3

I had us fastening, tidying up the frames and finishing off. The frames and trusses a already straight and square making go together like clockwork in 2 ½ days and better still no rot or termite damage. 

Well that’s it for the moment folks. Keep following the build and let me know your thoughts via my Scotty Cam Facebook Page. 

Won’t be long till the next update so stay tuned for part 7 coming very soon…


Related: Follow the Mudgee build

Mudgee – Follow the Build Part 7

KITCHEN AND LAUNDRY FRAME Here is another update on my project – Follow the Build Part 7. You would have read in Follow the Build Part 6 about using Bluescope Steel. Working away on the kitchen and laundry frame, it was a little differen ... [read more]

Mudgee – Follow the Build Part 5

IRONBARK POSTS AND BEAMS Here is another update on my project Follow the Build Part 5. You would have read Follow the Build Part 4 where I was working on the floor frame. Well I’ve got to say, this is the ultimate in carpentry for me. T ... [read more]

DIY Toothbrush Holder

This DIY Toothbrush Holder is so easy to make – you can even get the kids involved.

Check out this how-to video to create your very own DIY Toothbrush Holder or have a look at the photos below see how easy it is to make this DIY Toothbrush Holder with step-by-step instructions.

140729H+scot-1667

Step 1: Sandpaper

Use sandpaper to sand the block of timber. This will smooth the surface and get rid of any sharp edges. This timber can be as long as you like depending on how many toothbrushes you have. I chose a piece that will fit four toothbrushes nicely.

Step 2: Ruler and Pencil

140729H+scot-1485

Using a ruler and pencil, measure 30mm in from one end of the top of the timber and mark. Then measure and mark another 30mm from the first mark. Continue this process until you have four marks on the top of the timber that have a 30mm spacing between each other.

Step 3: Drill Bit

140729H+scot-1487

Find a drill bit that is the same thickness as the end of your toothbrushes to ensure the holes will be the perfect fit.

Step 4: Drill and Drill Bit

140729H+scot-1497

Using your drill and drill bit, make a 2cm-deep hole on each of the 30mm marks.

Step 5: Sand and Stain

140729H+scot-1501

Sand the timber down again to create a smoother finish. Use an old cloth to stain the timber. Make sure you are wearing latex gloves to avoid staining your hands. Leave the timber to dry. Now all you need to do is pop your family’s toothbrushes in and put on display in your bathroom.

Final Result: DIY Toothbrush Holder

HERO-1905


Related: Do it Yourself

DIY Deer Head

https://www.youtube.com/watch?v=mG8xV2PAkLw This is a chance to use your creative skills and have fun with designing your own deer head with antlers. It can have a modern or classical look or even a Christmas feel. Check out the DIY instruction ... [read more]

DIY Tealight Holder

This DIY Tealight Holder will impress and light up your dining table, with this preety platform for battery lights - it's so easy! Check out this easy how-to video to create your own tealight holder or have a look at the photos below to see ho ... [read more]

DIY Tealight Holder

This DIY Tealight Holder will impress and light up your dining table, with this preety platform for battery lights – it’s so easy!

Check out this easy how-to video to create your own tealight holder or have a look at the photos below to see how easy it is to make this DIY Tealight Holder with step-by-step instructions.

140729H+scot-1646

Step 1: Pencil and combination square

140729H+scot-1349

Using a pencil and a combination square, measure and mark a line vertically down the centre of your timber. This will ensure that your candles are sitting in a straight line. My piece of timber is 69mm wide so I’ve set my combination square to 34mm.

Step 2: Measuring tape

140729H+scot-1354

Using the measuring tape, mark 50mm from each end of the timber. This is where your left and right candles will sit. Then, place your tealights in a straight line in the centre of the timber, on the line you have created.

Step 3: Measure and mark

140729H+scot-1351

Measure and mark an 80mm distance between each candle. Continue this process until you have six marks separated by an 80mm gap.

Step 4: Depth of the candle

140729H+scot-1367

Measure the depth of the candle to determine where it sits on the forstner bit and start drilling the marked area. This top of the candle should be sitting flush with the timber. Repeat process.

Step 5: Sanding timber and staining timber

140729H+scot-1373

Sand the timber and use a cloth to give it a stain. Make sure to wear latex gloves when applying to avoid staining your hands.

Step 6: 

HERO-1872

Once completely dry, drop the tealights in.

Final result: DIY Tealight Holder

HERO-2369


Related: Do it Yourself

DIY Toothbrush Holder

This DIY Toothbrush Holder is so easy to make - you can even get the kids involved. Check out this how-to video to create your very own DIY Toothbrush Holder or have a look at the photos below see how easy it is to make this DIY Toothbrush Hol ... [read more]

DIY Timber Drink Stand

A Timber Drink Stand to solve your dilemma when having a drink or eating food whilst watching some telly. Watch this how-to video where I show you how you too can create a Timber Drink Stand for your armchair. Have a look at the photos and ... [read more]

Mudgee – Follow the Build Part 5

IRONBARK POSTS AND BEAMS

IMG_7597

Here is another update on my project Follow the Build Part 5.

You would have read Follow the Build Part 4 where I was working on the floor frame. Well I’ve got to say, this is the ultimate in carpentry for me. The big ironbark timber (which you can see), have got that real pioneer building feel to it. It’s just what I love with 23 magnificent sticks of 300 x 300 ironbark. The cross member beams are at 6m long, perimeter beams at 4.5m and posts at 4m. The 6m beams weigh in about 2 tonnes so machinery is required to cut them. It’s too big for a circular saw so it’s a chain saw all the way.

IMG_7565

First thing to do is to cut and stand the posts onto a concrete pier with a handmade stirrup prepared below the deck. The pier has a screw pier in the middle of it going down about 3m. So affectively the hardwood posts is secured 3m below the surface. These need to be secure as they are the structural basis of the entire lounge, dining and kitchen area.

IMG_7599

The perimeter beams and cross member need to be cut precisely to slot into each other. This timber is expensive so measure 5 times and cut once and don’t stuff it up! Because the timber is so big and I’m using a chain saw I can have a tolerance of about 5 mls but of course trying to get it as good as possible is key. All the cross members and perimeter beams are all in contact with the top of the posts so all the load is not on just the brackets.

IMG_1380 (2)

Last thing to do is bolt the whole thing off and the finished product looks spectacular.

Well that’s it for the moment folks. Keep following the build and let me know your thoughts via my Scotty Cam Facebook Page.

Won’t be long till the next update so stay tuned for part 6 coming very soon…


Related: Follow the Mudgee build

Mudgee – Follow the Build Part 6

BLUESCOPE STEEL FRAMES FOR THE BEDROOMS Here is another update on my project Follow the Build Part 6. You would have read in Follow the Build Part 5 which was all about iron bark posts and beams. Now I’ve always been a timber man when ... [read more]

Mudgee – Follow the Build Part 4

FLOOR FRAME I'm back with another instalment of Mudgee - Follow the Build Part 4. You would have read in Follow the Build Part 3 piers setout. Whilst we're building the new house here at Mudgee, you would have seen the progress of my new b ... [read more]

Mudgee – Follow the Build Part 4

FLOOR FRAME

IMG_6029

I’m back with another instalment of Mudgee – Follow the Build Part 4. You would have read in Follow the Build Part 3 piers setout.

Whilst we’re building the new house here at Mudgee, you would have seen the progress of my new building project as I’ve gone along. I hope this project of mine is inspiring you to look at doing something for yourself. See below on where I’m up to and keep following my progress on Mudgee.

IMG_6022

You can see in the image I took above, the screw piers are all in with ant caps bolted off. We are now ready for the floor frame. I absolutely love this bit because it means your starting to come up out of the ground and you can finally stand on the deck of the house which will one day be the ground floor of my new home.

IMG_0402

LVL bearers (laminated timber beams) straight on the piers then 90 x 45 joists at 450mm centres. I gunned the joists down, trimmed everything up and now I’m ready for the best part of the job – mucking around with the recycled hardwood I’ve got coming for the lounge / dinning frame.

Keep following the build and let me know your thoughts via my Scotty Cam Facebook Page.

Won’t be long till the next update so stay tuned for part 5 coming very soon….


Related: Follow the Mudgee build

Mudgee – Follow the Build Part 5

IRONBARK POSTS AND BEAMS Here is another update on my project Follow the Build Part 5. You would have read Follow the Build Part 4 where I was working on the floor frame. Well I’ve got to say, this is the ultimate in carpentry for me. T ... [read more]

Mudgee – Follow the Build Part 3

PIERS SETOUT Here is another update on my project – Follow the Build Part 3. You would have read in Follow the Build Part 2 which is all about excavation. Now that we have a good level site I’m getting into the set. It’s so importa ... [read more]