Tag Archives: DIY

5 things you should think about before starting on a bathroom reno

Wk1 Hannah & Clint working-18

Over the years I’ve seen even our most seasoned Blockheads come undone during bathroom week.

Given I’ve done more than a few bathrooms reno’s over the years I wanted to share with you 5 things everyone should think about before starting on a bathroom reno…

  1. Have all your tradies in place, cause there’s a lot of trades involved in a bathroom reno.

  2. Make sure your waterproofing is 100% waterproof, and is authorised by a licensed water-proofer.

WATERPROOFING_2

3. Plan your bathroom out well in advance so you know exactly where everything is going and making sure that you’ve got enough room to sit on the toilet, enough room to swing a cat in the shower.

RG ROOM PLANNING_4

4.Make sure your trades like your tiler are in play, which is very important. And make sure your tiler has come recommended as it’s very easy to muck up tiling, so make sure your tiler is a good one!

WATERPROOFING_4

5. And most importantly – WATCH YOUR BUDGET!

If you liked any of the products you saw on The Block, head over to The Block Shop and shop your favourite styles.


Related: The Block

Everyone’s talking about pools already… Should they?

Well, some couples are talking about pools and they’re crazy because they don’t know how their budget is going to go, and some of them are spending too much money on their bathroom already. So, house number one is never going to be able to ... [read more]

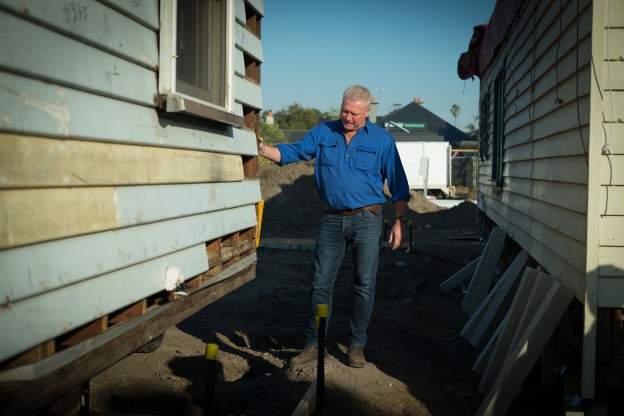
Why we move The Block houses

A lot of you Blockaholics might be wondering why we move the houses for the show, so here’s a little explanation as to why we do it. Moving the houses is a great alternative to demolishing them, and I cut my teeth on those styles of homes— t ... [read more]

DIY Photo Holder

Do you have lots of photos sitting in a draw? Why not let your family and friends enjoy some of these memories?

Watch this how-to video to make some simple and creative photo holders that you can use to display your treasured photos throughout the house.

As you can see from the photos below, all you need to start, is a piece of timber from your junk pile and Bob’s your uncle.

HP1114_Plus_Scotty08

Step 1: Mark out the centre line

HP1114_Plus_Scotty01

Step 2: Cut through the pine

HP1114_Plus_Scotty02

Step 3: Mark out the triangles

HP1114_Plus_Scotty04

Step 4: Cut out the photo holder

HP1114_Plus_Scotty06

Step 5: Sand down the photo holder

HP1114_Plus_Scotty05

Step 6: Paint the photo holder

HP1114_Plus_Scotty07

HP1114_Plus_Scotty10


Related: Do it Yourself

DIY Timber Blackboard

https://www.youtube.com/watch?v=eOE7CAfQ7QU You know when you’ve gotta leave a message for someone at home and you cant find paper or a pen? Check out this how-to video to make yourself a little blackboard for all the family to use. It's ... [read more]

DIY Magazine Rack

https://youtu.be/8iee3OCNHTg Here is a great idea to keep your magazines tidy and in order. Take a look at this how-to video of creating this easy magazine wall display. The pictures below also show how simple it is to create this timber fram ... [read more]

Book Shelves

IMG_0273 3

I always wanted a wall of books in one room, like a library room. So down to the workshop to knock them up. Veneered board with hardwood trim. A two tone bookshelf. I like them.

IMG_0270 (1)

IMG_0272 3

IMG_6803


Related: Interest Stories

Planes

Old carpentry tools have been a passion of mine for years. This is a full set of hand moulding planes that I am planning to put on display in a touchy feely artwork at the farm. [scotty_sign] [display-posts id='1802,1741' title='Relate ... [read more]

Paving

Nothing like getting free materials from the bush. The whole family got together. We got about 4 ute loads of reasonably flat river stones and bush rock and together as a team we paved the BBQ area with natural stone. It looks sensational. ... [read more]

Paving

339

Nothing like getting free materials from the bush. The whole family got together. We got about 4 ute loads of reasonably flat river stones and bush rock and together as a team we paved the BBQ area with natural stone. It looks sensational.

036

037

038


Related: Interest Stories

Book Shelves

I always wanted a wall of books in one room, like a library room. So down to the workshop to knock them up. Veneered board with hardwood trim. A two tone bookshelf. I like them. [scotty_sign] [display-posts id='1751,1733' title= ... [read more]

Lucas Mill

A few years ago I bought a Lucas Mill. It’s a portable saw mill which you build over the log. We head up the top of the mountain where there’s plenty of fallen or dead trees; stringy bark, red box, etc. I drag the barrel of the tree out in th ... [read more]

Follow the Build – Mudgee Part 15

IMG_1668

This outdoor BBQ means a lot to the family. So that’s why we kept it and the deck and built the new house around it. All of our family memories have been around that fire. I laid 600 bricks to build it and the hot plate is a 8mm plate weighing about 250kg. The cooking surface is 6’ x 4’ so thirty odd T Bones are not a problem. Only problem was from time to time it would smoke the deck out, (hence the goggles), so after years of copping the smoke while cooking and eating I decided to put some doors on and a chimney to draw the smoke.

IMG_1297

IMG_1402

IMG_5154

IMG_0848


Related: Follow the Mudgee build

Follow the Build – Mudgee Part 16

Every bush house needs water tanks for all your water for the house but you now also need 25,000 litres purely designated for fire fighting. The two tanks at the house are for the house. The 40,000 litre tank at the shed is our designated fire ... [read more]

Follow The Build – Mudgee Part 14

It’s always good to start fitting the house out – bathrooms and the like but it’s the kitchen that’s always fun. I love wood stoves and Rayburn still make the same wood stove they’ve been making for years. So I ordered one with a smalle ... [read more]

Lucas Mill

103

A few years ago I bought a Lucas Mill. It’s a portable saw mill which you build over the log. We head up the top of the mountain where there’s plenty of fallen or dead trees; stringy bark, red box, etc. I drag the barrel of the tree out in the open with the tractor onto level ground, then build the mill over the top. It takes about ½ hour to set up, then you’re away, 4 x 2’s, 6 x 2’s, you can even slab up table tops. It’s been a great purchase. The dining table at home came from the mill. I love it.

100

101 104


Related: Interest Stories

Paving

Nothing like getting free materials from the bush. The whole family got together. We got about 4 ute loads of reasonably flat river stones and bush rock and together as a team we paved the BBQ area with natural stone. It looks sensational. ... [read more]

Dining Table

One of the greatest tools I have is a Lucas Mill (Google it). It’s a portable mill which you build over the fallen log. We had a nice tree unfortunately come down on the property, a white stringy bark gum. It’s timber is not used that much ... [read more]

Dining Table

IMG_1334

One of the greatest tools I have is a Lucas Mill (Google it). It’s a portable mill which you build over the fallen log. We had a nice tree unfortunately come down on the property, a white stringy bark gum. It’s timber is not used that much anymore but in the old days it was used for flooring, furniture and some structural jobs etc. So I threw the Lucas Mill over it, slabbed it up, dried it on the mountain floor for a while, then built our family dinning room table out of it. We’ve had it for about 10 years now and love it. In fact I’m writing this story sitting at it right now.

20170206_163207


Related: Interest Stories

Lucas Mill

A few years ago I bought a Lucas Mill. It’s a portable saw mill which you build over the log. We head up the top of the mountain where there’s plenty of fallen or dead trees; stringy bark, red box, etc. I drag the barrel of the tree out in th ... [read more]

New Bifolds

This was an outdoor area at home but it was never used so I decided to put in bifold doors, a side window and fixed glass surrounding this space. We gained an extra room and created a new space away from the existing lounge with great views of ... [read more]

DIY Timber Blackboard

You know when you’ve gotta leave a message for someone at home and you cant find paper or a pen?

Check out this how-to video to make yourself a little blackboard for all the family to use. It’s perfect for the kitchen where everyone can write their messages and a great idea for your shopping lists too.

Have a look at the photos below how easy it is to create this timber framed message board.

140729H+scot-1679

Step 1: Paint

140729H+scot-1507

First, you’ll need a 565mm by 900mm MDF board. Then you can paint your MDF board with blackboard paint. You can leave it to dry while you knock up your timber frame.

Step 2: Measure the timber lengths

140729H+scot-1511

You can now cut your lengths of timber. I’ve used a drop saw. The timber frame needs to go on the face of the blackboard, so therefore you want your frame to be slightly bigger than your board. So the outside of the frame should measure 575mm by 910mm.

Step 3: Cut the timber

140729H+scot-1514

I’m using mitre joints, which are quite difficult if you don’t have a drop saw. You could also use a mitre box or butt joint your joints if you aren’t confident.

Step 4: Line up the lengths of timber

140729H+scot-1521

You should have two long bits and two short bits to make up your frame. It’s important that all four pieces are exactly the same in length to the half mill, so you don’t throw your dimensions out.

Step 5: Sit the blackboard in the frame

140729H+scot-1529

You can then nail the frame to the bench to hold it in position, then place the blackboard over the top of the frame, about 5mm from each edge. Now you can screw the blackboard to the frame, and you have a blackboard for the kitchen where everyone can leave their messages.


Related: Do it Yourself

DIY Photo Holder

https://www.youtube.com/watch?v=LEnUN-yoj84 Do you have lots of photos sitting in a draw? Why not let your family and friends enjoy some of these memories? Watch this how-to video to make some simple and creative photo holders that you can us ... [read more]

DIY Magazine Rack

https://youtu.be/8iee3OCNHTg Here is a great idea to keep your magazines tidy and in order. Take a look at this how-to video of creating this easy magazine wall display. The pictures below also show how simple it is to create this timber fram ... [read more]


DIY Magazine Rack

Here is a great idea to keep your magazines tidy and in order. Take a look at this how-to video of creating this easy magazine wall display.

The pictures below also show how simple it is to create this timber frame and then to add the rope – drill, thread, knot and its ready to go.

140729H+scot-1657

Step 1: Measure and mark

140729H+scot-1428\

Measure and mark 600mm (or find the centre) on one 1.2m timber length.

Step 2: Cut the timber

140729H+scot-1435

Cut the timber using a drop saw (a handsaw will also get the job done). This will give you two 600mm lengths – these will be the top and bottom of the frame. Measure and mark the thickness of the timber on both ends of the second 1.2m length. This will make sure you don’t go too close to the edges when drilling. Repeat process on second 1.2m length.

Step 3: Find the centre and drill

140729H+scot-1441

Find the centre of the traced-out square on one end of the 1.2m timber and use a drill and drill bit to make two holes on either side of the centre point, about 1cm apart. Repeat on all four ends. Make sure the holes are slightly bigger than the screw, so the screw has room to move.

Step 4: Form the frame

140729H+scot-1443

Clamp bottom timber (600mm length) on table. Insert screws into the 1.2m-timber holes and align timber and screws on the side of the 600mm length, creating a corner, and screw in place. Repeat process on all four sides, forming a frame. Sand frame well and give it a stain. Leave to dry.

Step 5: Measure and mark

140729H+scot-1447

Measure and mark 150mm in one of the 1.2m sides, starting from the corner. Then from the first 150mm mark, measure and mark another 150mm space this process until you have six marks and a 150mm space between each. Repeat process on the other 1.2m side.

Step 6: Measure and mark

140729H+scot-1452

Measure and mark 21mm in at each 150mm point using a combination square. This will give you the exact centre point, so you drill in the centre of the timber.

Step 7: Drill the holes

140729H+scot-1459

Using a drill and a drill bit that is slightly bigger than the rope, drill holes going all the way through each mark. You should now have 12 holes, six on either side.

Step 8: Thread the rope

140729H+scot-1472

Thread the rope through the holes, cut off excess rope and tie a knot on the ends, making sure the rope is as tight as possible so the string stays in place.

Final step: DIY magazine rack

140729H+scot-1476


Related: Do it Yourself

DIY Timber Blackboard

https://www.youtube.com/watch?v=eOE7CAfQ7QU You know when you’ve gotta leave a message for someone at home and you cant find paper or a pen? Check out this how-to video to make yourself a little blackboard for all the family to use. It's ... [read more]

DIY Art Boards

https://www.youtube.com/watch?v=Exh6v5Gr5hU These art boards are a great way to show off your kid’s art work and knowing how many masterpieces come home each week from school, its also an easy way to update the displays. Have a look at the ... [read more]