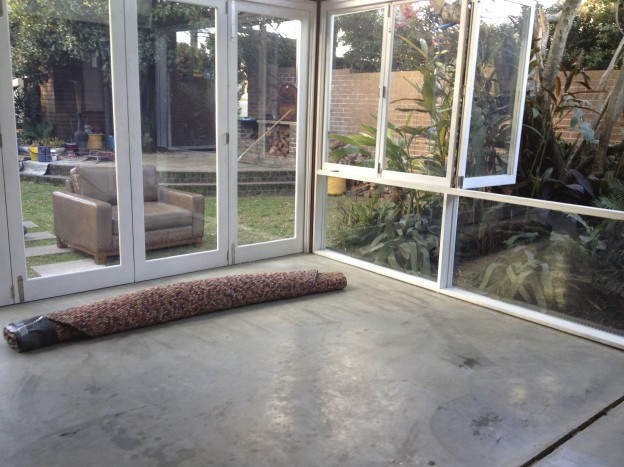
This was an outdoor area at home but it was never used so I decided to put in bifold doors, a side window and fixed glass surrounding this space. We gained an extra room and created a new space away from the existing lounge with great views of the garden. A little chill out zone. The bifolds needed a channel cut into the slab for them to track on. I’m using my demo saw with the water attachment to make two saw cuts 20 mm apart and 20 mm deep, then chip out the channel with a small electric jack hammer.
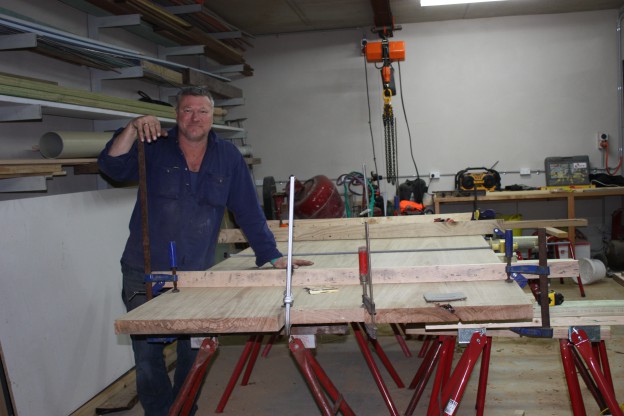
One of the greatest tools I have is a Lucas Mill (Google it). It’s a portable mill which you build over the fallen log. We had a nice tree unfortunately come down on the property, a white stringy bark gum. It’s timber is not used that much ... [read more]
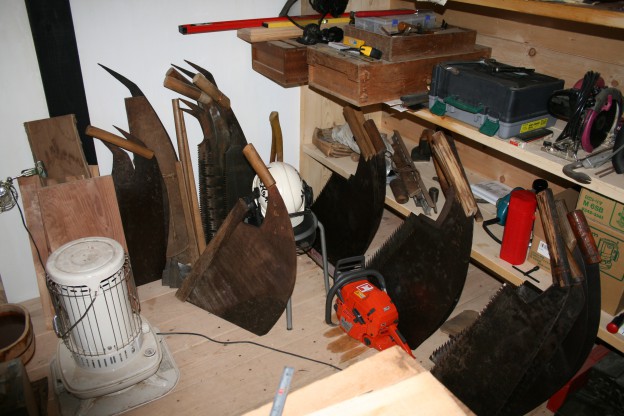
I visited Japan a few years ago and dropped into a master carpenter’s workshop. What an incredible experience it was! The timber, the tools, the craftsmanship, it was all amazing.
The handsaw in the photo was used to cut a 60mm slab from a l ... [read more]
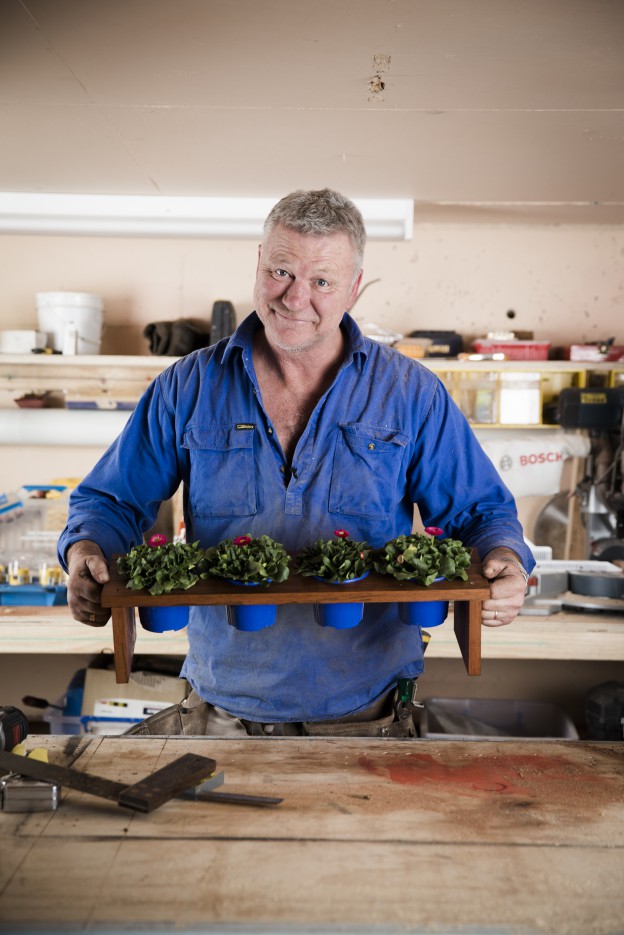
Do you want your kitchen window sill to look greener?
Then watch this how-to video to make the perfect shelf for your pots. This simple timber plant stand, for inside or outside, is just the thing for your herbs or flowers.
Check out the photos below to see how easy it is to create this great stand that frames your pots.
Step 1: Measure and mark
Use your measuring tape and pencil to mark out where your round holes will be drilled in your length of timber. Choose a piece of wood that will fit well on your windowsill. My piece of timber is long, so I’m going to cut it in half and use the excess to make the legs. Make sure you measure out the spaces in between your holes evenly.
Step 2: Cut your holes
I’ve used a holesaw drill bit, which will come in handy for future projects if you decide to invest in one. I’ve measured the pots and picked a holesaw that matches the size of the pots to give them a perfect fit within the shelf.
Step 3: Sanding
Sand your timber down, then cut the two leg pieces from the wood using the drop saw.
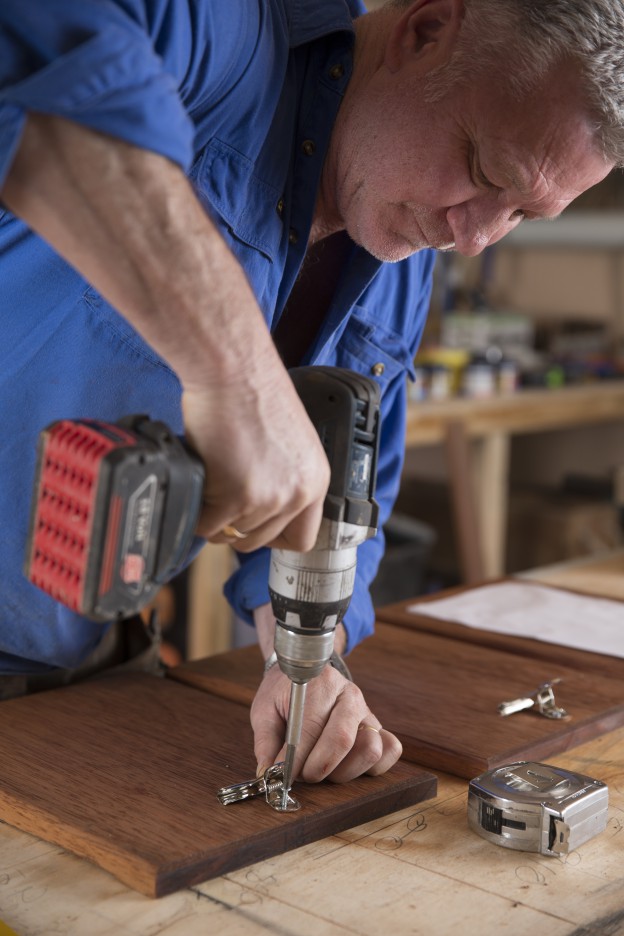
Step four: Screw in the legs
Next you need to screw the top onto the legs. Drill down through the top into the legs and insert three screws on each side. The timber I’ve used is hardwood, so when you go to drill the legs on, it’s going to be tougher for the screws to countersink on the surface. Use a bigger drill bit to put a countersink hole at the top so the screw sits flush.
Step five: Staining
Give the legs a bit of a sand down to smooth the surface and get rid of any sharp or rough edges. Then, wearing gloves, wipe on the all-weather stain, so your shelf looks great and copes well with being outside.
https://www.youtube.com/watch?v=Exh6v5Gr5hU
These art boards are a great way to show off your kid’s art work and knowing how many masterpieces come home each week from school, its also an easy way to update the displays.
Have a look at the ... [read more]
https://youtu.be/12p2w0fVU3o
Creating Christmas decorations for the tree can be simple and fun. All you need is timber, a drill, paint and a rope.
Watch this how-to video and check out the pictures below on how to create this little Christmas ... [read more]
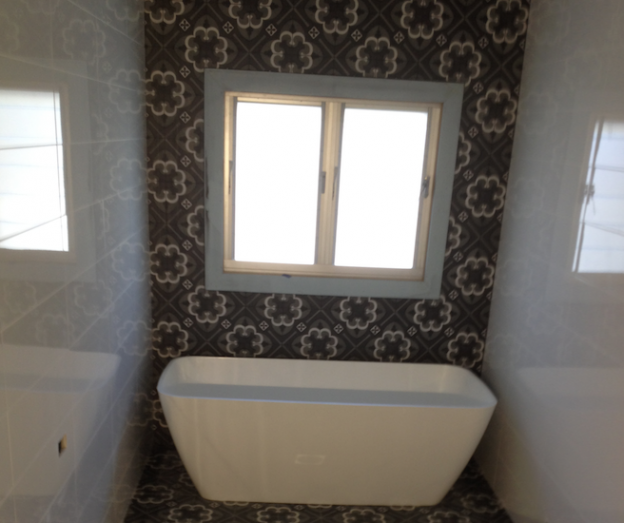
It’s always hard to choose tiles for the wet areas, so many choices at Beaumont’s but with the help of the girls there, I came up with some great ideas. I just hope Shayna, Neil and Darren don’t come over for a barbie. In the ensuite though, I did copy Brad and Dale’s winning bathroom from Fans v Favourites.
I did want a polished concrete floor throughout the house but had some hesitation about slab on ground in the bush. I know it’s done everywhere but I do like the under house ventilation a frame gives you. So I went with steel screw piers as we ... [read more]
INTERNAL WALLS
At long last, The Block has wrapped up for another year. The auction was outstanding, and I couldn't be happier with all the hard work our Blockheads put in. But now that’s done and dusted, it’s time for me to get back to work ... [read more]
Creating Christmas decorations for the tree can be simple and fun. All you need is timber, a drill, paint and a rope.
Watch this how-to video and check out the pictures below on how to create this little Christmas house. Using this simple idea you can design and create a variety of decorations at this festive time.
Begin with length of timber (7cm x 4cm) Plus timber scraps to use as stamps; pencil; ruler; circular saw; drill; paintbrush; red paint; black paint; rope
Step 1: Mark the centre point
Place the timber on the table longways vertically. On the top edge, mark the centre point.
Step 2: The roof
To create the roof line, rule a diagonal line about 45° from the centre point to the right, towards the outside edge. Repeat on left side. The lines don’t have to be perfectly even – it’s better if your house is a bit rough looking.
Step 3: Circular saw
Use a circular saw to cut along the lines, creating the house shape. Now work out how big your house needs to be and mark the bottom line – about 7cm down from the roof line. Cut along that line with the saw.
Step 4: Drill a hole
You need to be able to hang your decoration, so drill a hole right through, near the roof peak.
Step 5: Paint
Paint the roof red.
Step 6: Windows and door
Use timber scraps to stamp the window and door. My window is a 1cm square and my door is about 1cm x 2cm. Dip the end of the small stamp into black paint then press onto the house in the window positions. Repeat with the other stamp to make the door shape.
Step 7: Rope
Thread rope through the hole. Tie a knot then trim excess length.
https://www.youtube.com/watch?v=u8rgQEJNKzw
Do you want your kitchen window sill to look greener?
Then watch this how-to video to make the perfect shelf for your pots. This simple timber plant stand, for inside or outside, is just the thing for ... [read more]
https://www.youtube.com/watch?v=mG8xV2PAkLw
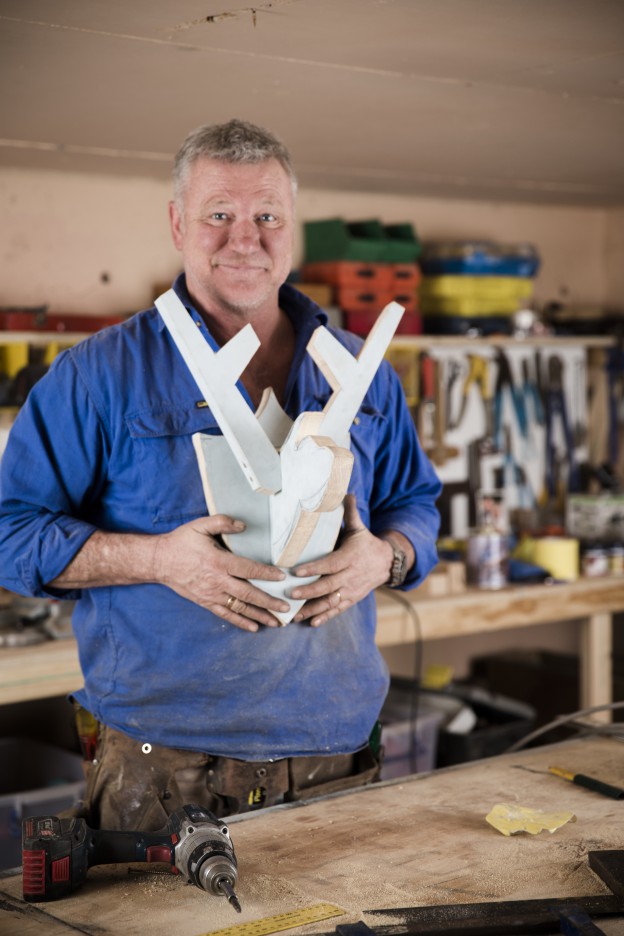
This is a chance to use your creative skills and have fun with designing your own deer head with antlers. It can have a modern or classical look or even a Christmas feel.
Check out the DIY instruction ... [read more]
There’s nothing quite like some nice crispy pork crackling. My whole family loves it and it’s the perfect centrepiece to any Christmas lunch or dinner. Follow the instructions below to find out how to cook up some ripper pork crackling like mine.
Step 1: Massage oil and salt into the skin like you love it.
Step 2: Have your BBQ on super hot.
Step 3: Cook with the lid down for 40mins.
Step 4: Turn heat down to normal cooking temperature, time will depend on size.
I do mine on a rotisserie that I have on my BBQ and it turns out a treat.
I visited Japan a few years ago and dropped into a master carpenter’s workshop. What an incredible experience it was! The timber, the tools, the craftsmanship, it was all amazing.
The handsaw in the photo was used to cut a 60mm slab from a large piece of timber, about 4mtrs long 500 x 500, all cut by hand. A chalk line was flicked on both sides of the timber and my old mate used this saw to hand cut the slab, always keeping to the lines on both sides and square and true. Amazing!
This saw is a pull saw so the cutting is done on the pull stroke not the push. In the third photos you can see some of the many chisels that my Japanese carpentry mate has. Incredibly sharp and beautifully maintained, they treat their tools like gold.
This was an outdoor area at home but it was never used so I decided to put in bifold doors, a side window and fixed glass surrounding this space. We gained an extra room and created a new space away from the existing lounge with great views of ... [read more]
These days recycled water is the way to go. Why we got rid of rainwater tanks years ago is beyond me. I’m glad to see them coming back. We know that rainwater is a valuable source. Using rainwater not only helps to reduce your bills therefore s ... [read more]
This is a chance to use your creative skills and have fun with designing your own deer head with antlers. It can have a modern or classical look or even a Christmas feel.
Check out the DIY instruction on the video and the pictures below to see how simple it is to create your own wall mounted Deer Head.
https://youtu.be/12p2w0fVU3o
Creating Christmas decorations for the tree can be simple and fun. All you need is timber, a drill, paint and a rope.
Watch this how-to video and check out the pictures below on how to create this little Christmas ... [read more]
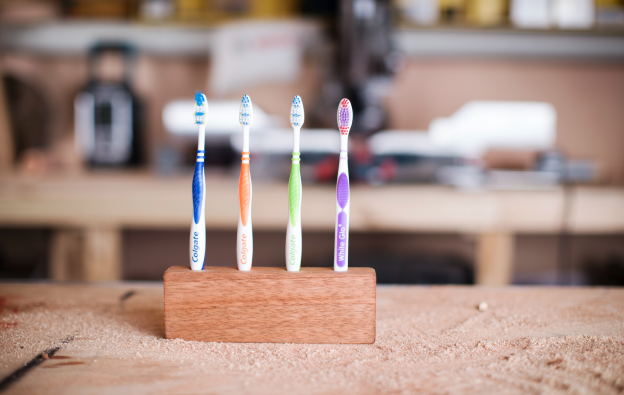
This DIY Toothbrush Holder is so easy to make - you can even get the kids involved.
Check out this how-to video to create your very own DIY Toothbrush Holder or have a look at the photos below see how easy it is to make this DIY Toothbrush Hol ... [read more]
This is a gadget that I absolutely love. I use it all the time and people always ask me about it. I got mine from a commercial kitchen shop in Crows Nest.
How it works is easy. Cut the top of your pineapple straight off, line it up about centre, just push it down and start turning – trying to keep it straight. Go all the way down to the bottom of the pineapple and pull the peeler out once you’re done. Once you’ve pulled the peeler out, take the handle off and slide the pineapple rings down and off the peeler. Now that is genius.
At long last, The Block has wrapped up for another year. The auction was outstanding, and I couldn’t be happier with all the hard work our Blockheads put in. But now that’s done and dusted, it’s time for me to get back to work on my own project.
Here’s the latest update on my project Follow the Build – Part 11.
Now that we’re locked up, it’s time to plaster. One of the local boys came into Gyprock all the walls and ceilings and because I’ve got the screw piers down below, there’ll be no movement and therefore no cracking in the joints or cornices. It’s always great to see plaster on the walls because it means the joint is really starting to come together.
That’s all for now, folks. Keep following the build and let me know your thoughts on my Scotty Cam Facebook Page.
Won’t be long til the next update so stay tuned for part 12 coming very soon…
TILING THE BATHROOMS
It’s always hard to choose tiles for the wet areas, so many choices at Beaumont’s but with the help of the girls there, I came up with some great ideas. I just hope Shayna, Neil and Darren don’t come over for a barbie.� ... [read more]
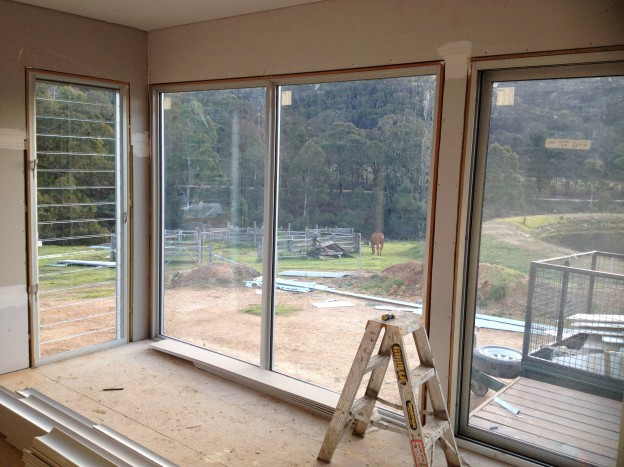
EXTERNAL WINDOWS AND DOORS
It’s been a busy few weeks for me as The Block has gotten down to the business end of the competition. But my projects are coming along nicely.
Here’s the latest update on my project Follow the Build – Part ... [read more]